You have /5 articles left.
Sign up for a free account or log in.
Recently, I was asked if I would be willing to give a keynote for a professional development event at a university. However, instead of coming to campus and delivering a presentation, the organizers wanted a "virtual keynote." While I've done numerous in-person presentations, webinars, and even a weekly web-based show, I've never done a virtual keynote.
Conceptually speaking, I figured that it wouldn't be too difficult. A 30 minute presentation with slides, video, and audio…how hard could it be? Lecture capture is done all of the time. I went through the applications on my MacBook Pro…I had demo copies of SnagIt and Camtasia. After a quick peek at Camtasia, I went ahead and purchased the full version. After all, it's an app that I can use for future presentations. The latest version of Camtasia is quite nice. The recording interface is perfectly simple and the editor works really well. And then I realized that what I wanted to do didn't necessarily require Camtasia. Now, I'm not knocking Camtasia at all. It's an awesome capture solution. Except, I am much more familiar with using iMovie. And then I discovered the "cutaway" option in the iMovie editor and my 30 minute keynote went from concept to reality.
The first step in creating my virtual keynote was to record myself giving the actual talk. In iMovie, you can capture and record video directly. Using the iSight in my external display and my external USB microphone, I recorded myself at my desk. I placed my slide show from Keynote in front of iMovie and gave my talk as if I were giving it to an actual audience. 30 minutes later, I had audio/video that was ready for editing in iMovie.
A nifty feature in Keynote is that you can export every single slide as a separate, high resolution graphic. Alternatively, you could also just create amazing graphics in Adobe PhotoShop. But for this example, my tech recipe was iMovie + Keynote. I matched the resolution of my slide deck to the highest video resolution in iMovie so that my images would be sized correctly in each frame.
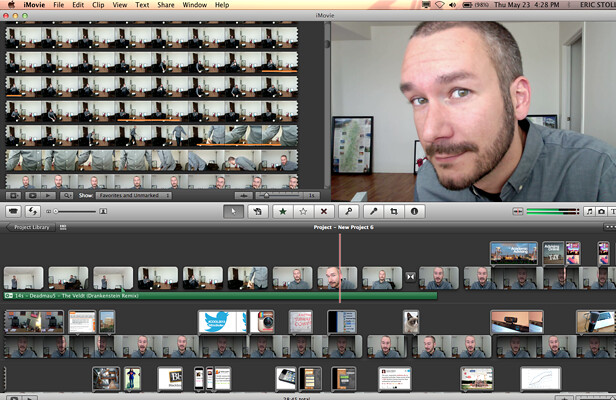
After exporting my slides as independent images, I went back to the clip editor in iMovie. Dragging each slide over the clip editor to specific places in the video took a little bit of time. When you drag an image file over the clip editor, an option menu appears. I choose the "cutaway" feature so that the video would transition from me speaking to the image of the slide that I had just pasted. The best part about this option is that your voiceover continues while your slide graphic is displayed. You can edit the amount of time that a slide appears. Some of my slides only appeared for a moment or two while others were on screen for several seconds. The default Ken Burns effect gave each slide an extra dose of movement. Additional options for pasting images include picture-in-picture and side by side. All of the paste options work with video as well as images. Simply add video as an event in iMovie and you can create fairly sophisticated videos.
For my keynote, I added some random clips at the beginning and end of the video, included some music from iTunes for the intro and outro, and exported the finished product after about three hours of production time. The video file was fairly large. At more than 1.5 gigs, it took a while to upload to YouTube as well as a cloud-based storage site. It's always a good idea to have a back-up for web video. In this case, YouTube was the back-up and the institution's video streaming platform was the primary delivery method.
While I was busy speaking (in-person) at Chapman University in Orange, California, academic advisors at Davenport University were watching me give a talk. It was probably my most efficient day as a speaker!
If you have access to iMovie and Keynote, the potential for all sorts of projects using this method is pretty grand. While you won't be able to do live-action screen captures (see Camtasia), this method is certainly a terrific option. One thing that I would highly recommend is that you always use a high quality USB microphone. Audio can make or break a video. My microphone is mounted on a heavy duty mic stand that allows me to suspend the mic above my head. Note that in this case, captions weren't added, however, there are numerous captioning solutions on the web.
For Windows users, what applications do you use for this type of project?
Do you tweet? Let's connect. Follow me on Twitter.